

Screenprints
If you have ever wanted to know how a screenprint is created, then read on …
You’ll be able to follow every step of the creative process and see each stage in the development of an eight colour screenprint.
The idea for a screenprint featuring a brown trout swam out of some earlier artwork.
Some years ago, Martin painted these watercolour variations of two amazing Japanese woodblock prints of catfish by Utagawa Kuniyoshi


During the summer of 2021, Martin spent an afternoon painting a watercolour of a stream in rural mid-Wales


These led to some watercolour sketches of trout and river weed, based on other photos Martin had taken while travelling around the UK.


He put these ideas together in a full size watercolour sketch.

But for a variety of reasons this didn’t seem to be the right image for a screenprint. It wasn’t bold enough and the perspective wasn’t working.
The project was put on hold for a few weeks, waiting for inspiration until ….a quick doodle led to a more detailed drawing …. first in black and white ….


…. and then in colour

Perhaps a bit too much colour!
Now it’s time to work out the screenprint. How many colours? Which colours? How realistic or vibrant should the colours be? How opaque or translucent to make the colours? To what extent should the colours be allowed to overlap in order to create extra colours or shades? Whether to grade the colours so that they look different in different parts of the picture. It can be a complicated process.

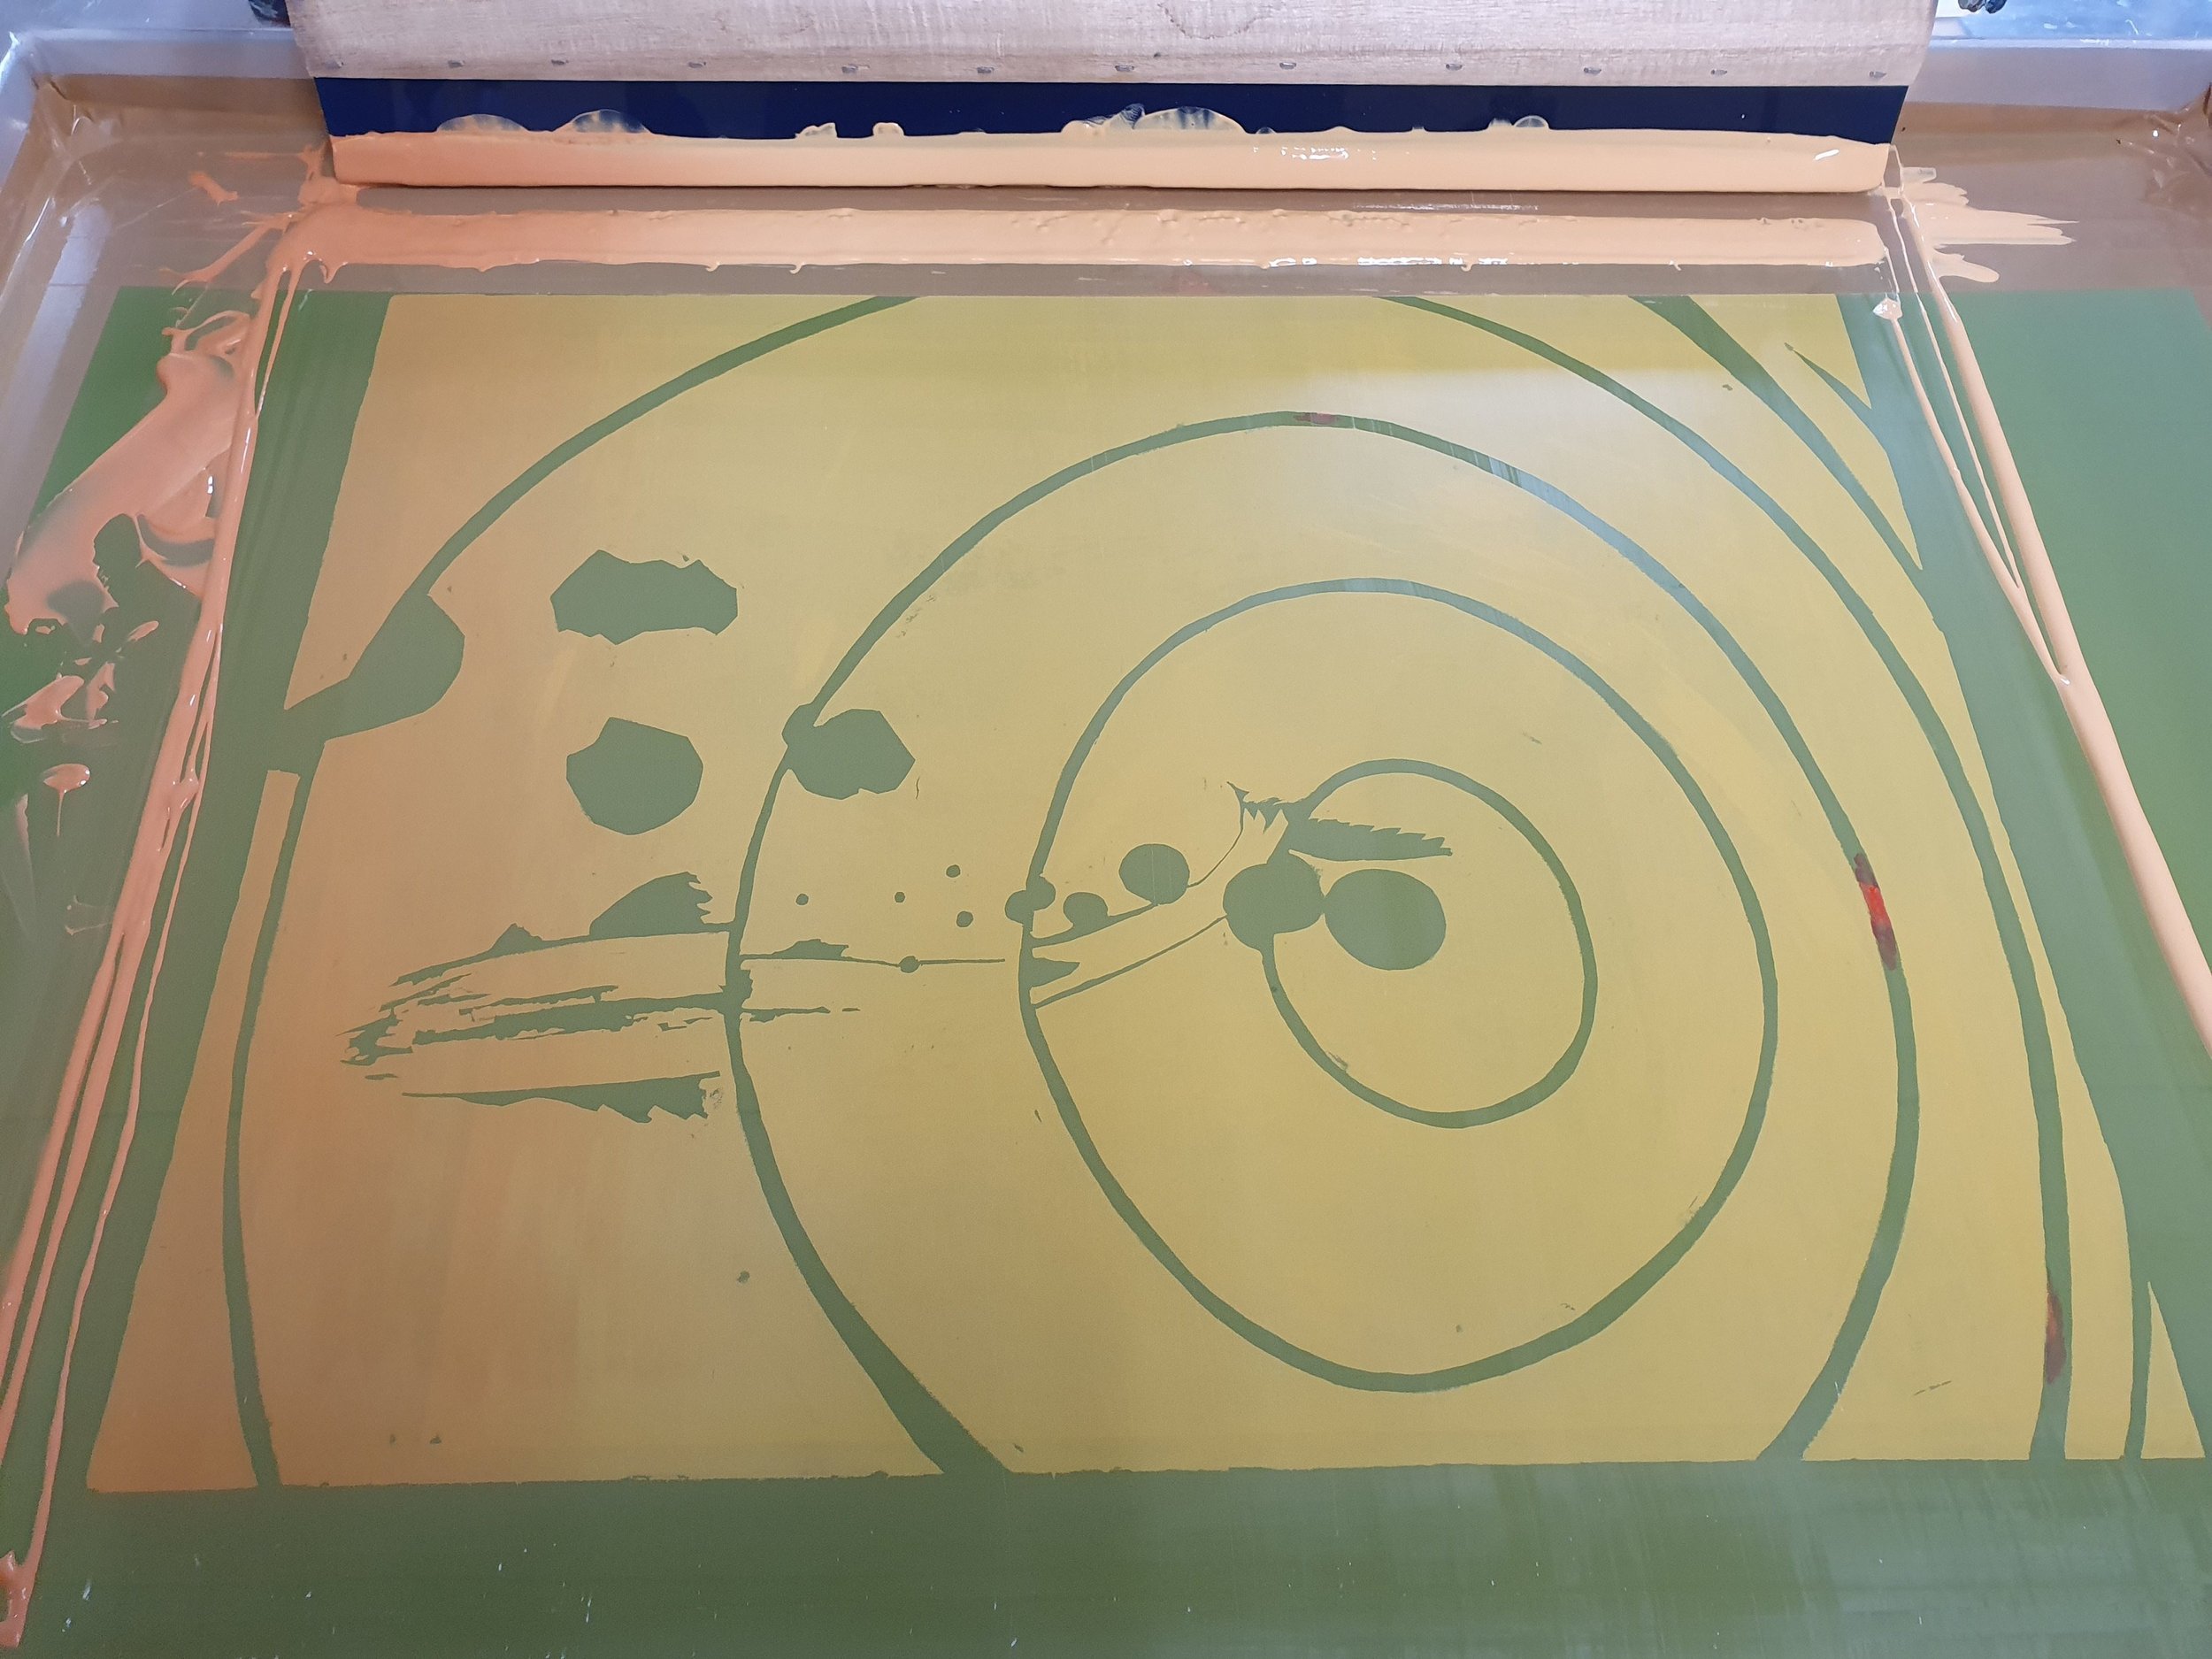
Screenprinting in action - Martin at Sonsoles studio in Peckham.
How is a screenprint made?
Screenprints are created by using a ‘squeegee’ to pull ink through a mesh screen, which is stretched tight over a frame, onto the paper or textile below. The screen is blocked out to create a ‘stencil’. The ink passes only through the open parts of the mesh, which results in a printed image below. By overlaying several stencils, it is possible to produce a complex multi-coloured print.
What inks are used?
When Martin first started screenprinting, he used oil-based inks. These had to be diluted and/or cleaned with solvents which are bad for the environment. Nowadays, most screenprinting is done with water based inks and media. Martin mixes and blends the inks himself using a screenprinting medium and colour pigments to create the desired effects. This adds further subtlety, and also makes the process more exciting and less predictable.
How is the stencil made?
Stencils can be made in a variety of ways. Assuming that water-based inks are being used, the screen can be blocked out with thick paper or card cut-outs, waterproof tape or basically any medium which will obstruct the flow of ink through the open mesh of the screen.
Martin draws his images by hand onto tracing paper or drawing film. The drawings are placed under a screen which has a photographic coating on the mesh and exposed to strong light. Any parts of the drawing which are opaque and repel the light remain unexposed and can be washed out with water.

Here is an example of a drawing on drafting film which was used to make a stencil. The drawing uses a combination of opaque pen (for the harder outlines) and oil pastel (for the softer lines and shapes)
Now it’s time to start printing!
The next sequence of photographs will show you step by step how the brown trout screenprint evolved
Step 1
A blend of creamy yellow to orange

Step 2
A pinky brown

Step 3
A blended green
Some of the foliage shapes were achieved through scratching pigment from the original drawing

Step 4
A translucent light blue
The translucent ink means that the blue is much lighter and brighter when it is covering the bare paper than when it prints over the top of the green or brown layers. Some of the drawing was done in oil pastel to give the ‘river weed’ some texture.
Step 5
A translucent purple
Translucent ink was used to give more substance to the fish and make the whole image more three-dimensional.

Step 6
Bright orange
A bit fiddly this. Just a few orange spots. Not all river trout have this colour, so this was largely an artistic device to draw the eye to the fish.

Step 7
A blend of translucent dark grey/navy
The trout still needed more detail and contrast. This layer was also used to give some extra shading to the rocks and river weed.

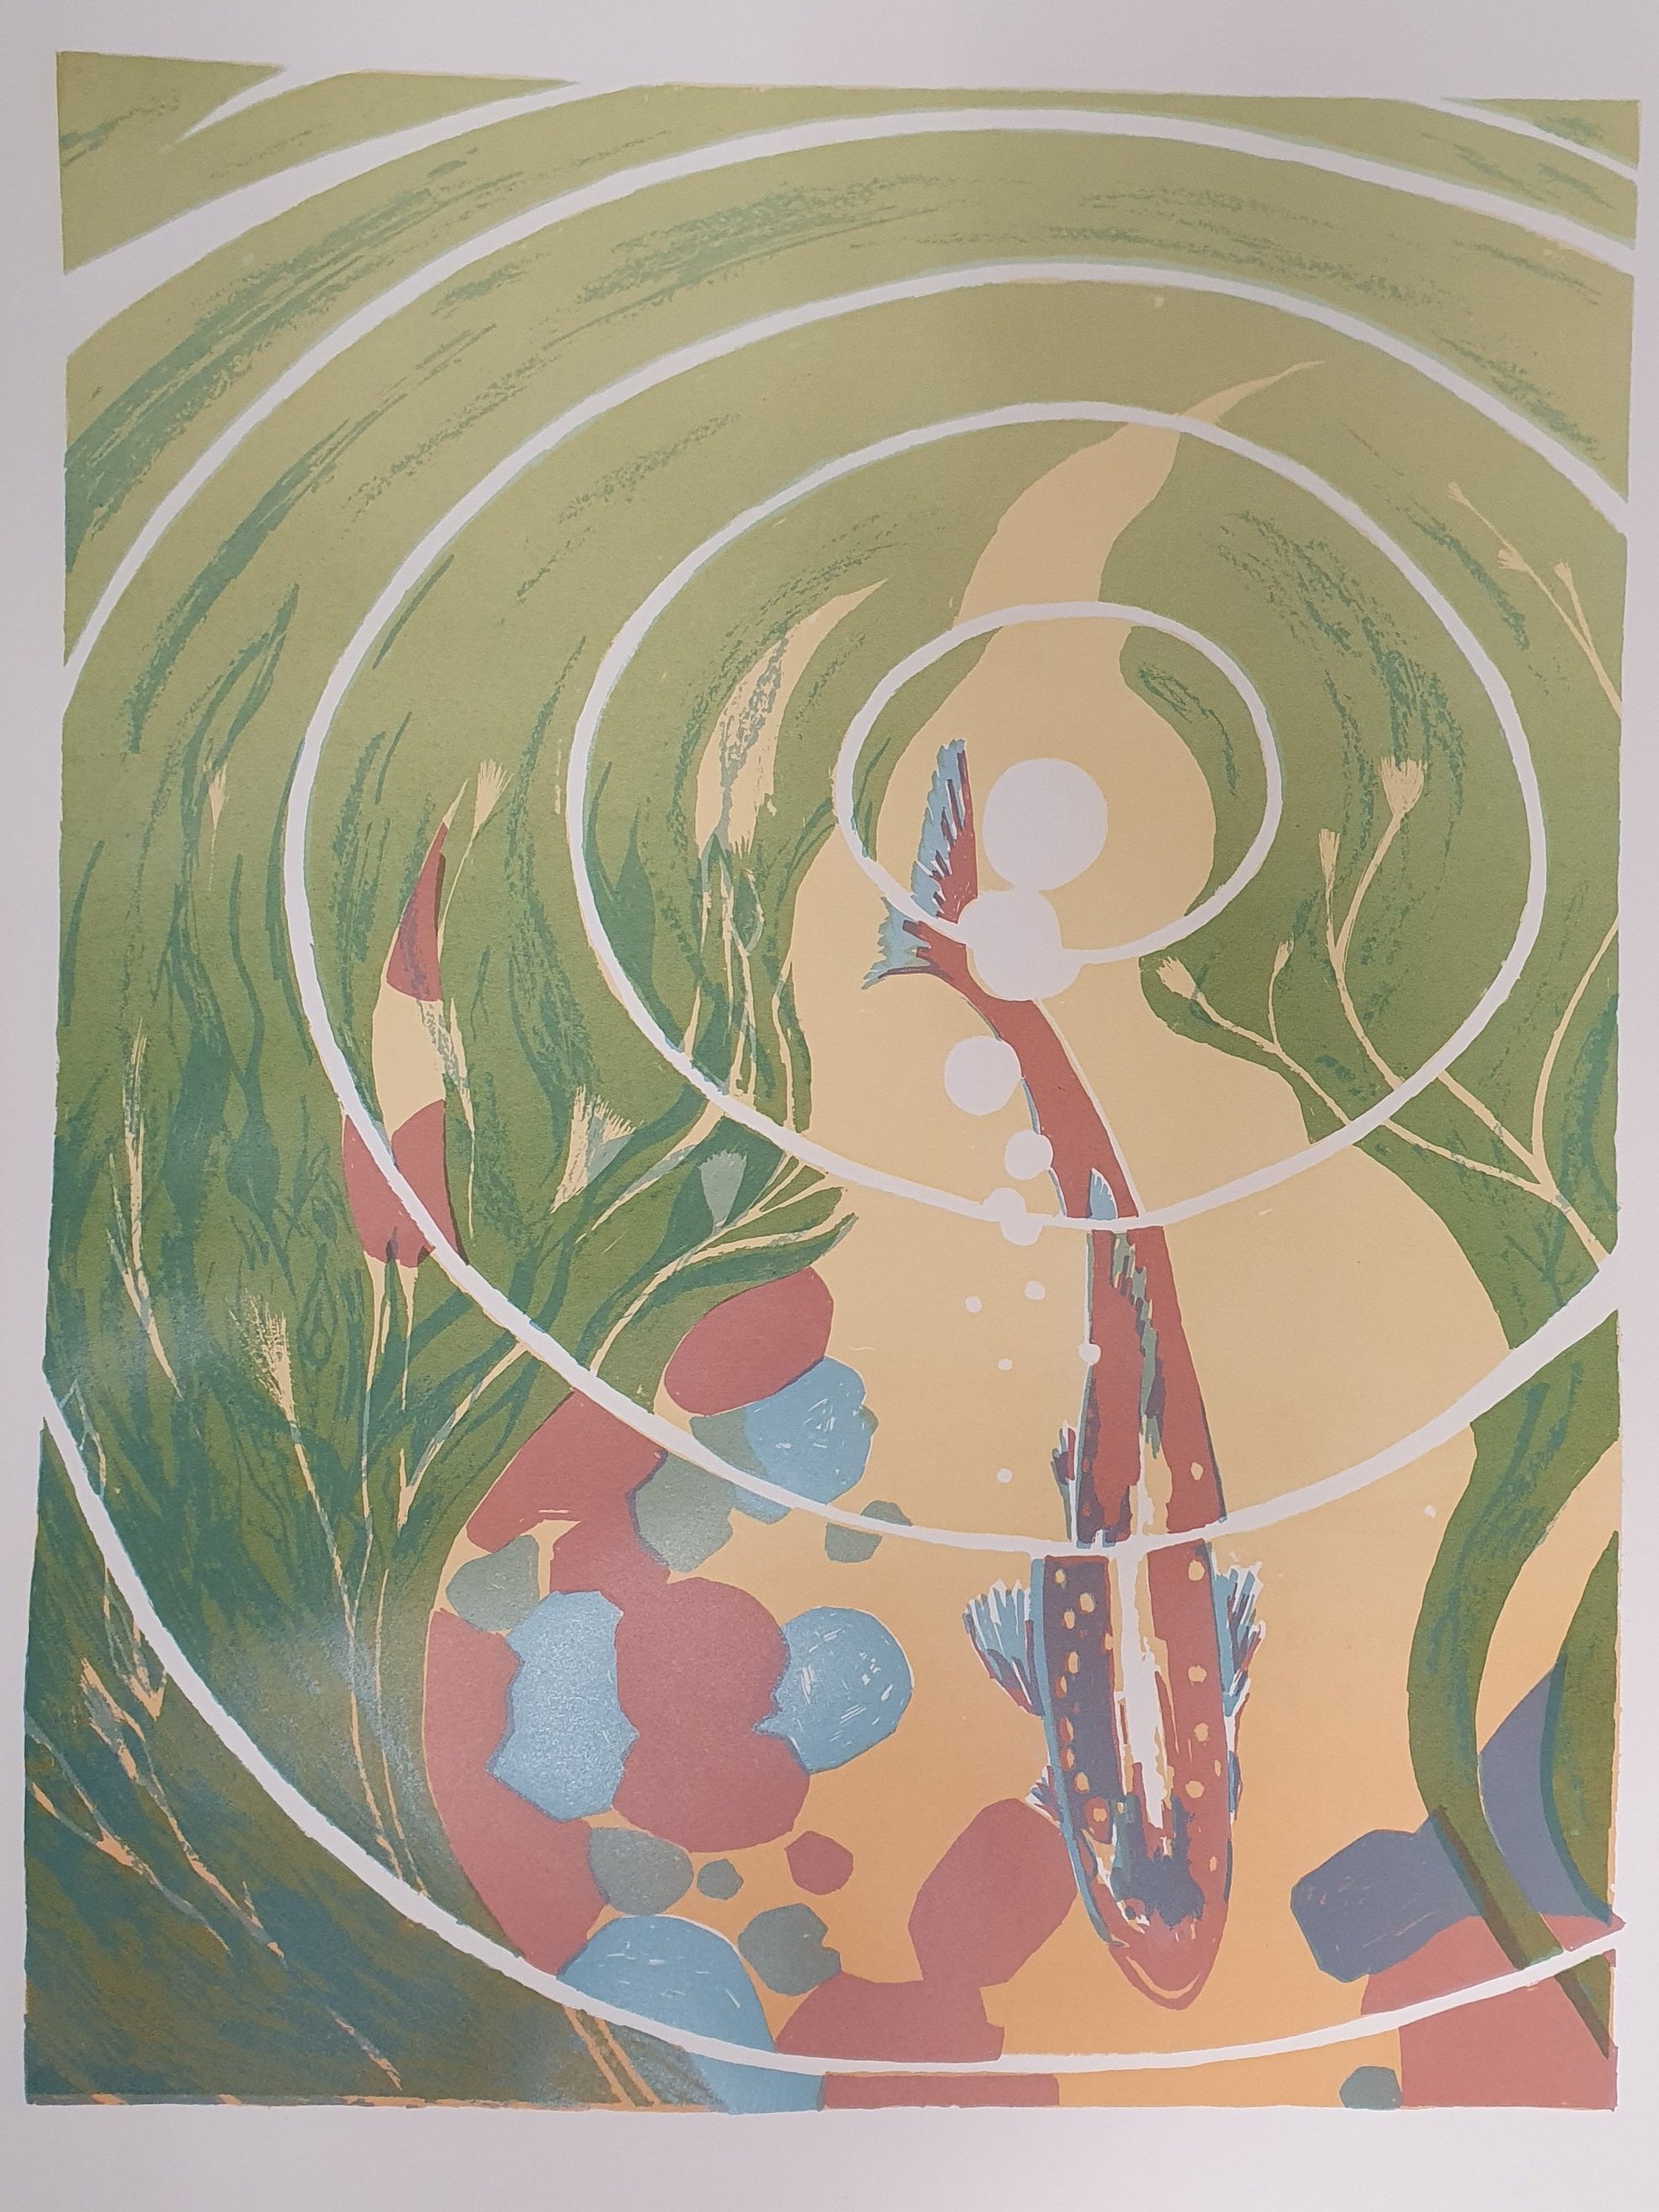
Step 8
A light blue blended into a very translucent light blue
This last layer was designed to recreate some of the reflections and swirl in the water from the original riverside photos and the pencil drawing.
Making sure that all the different print layers are properly aligned (‘registration’) takes a lot of patience and persistence. Even so, each print is likely to turn out slightly different from all the others.

Here is the final version
As with all of Martin’s screenprints, his initials ‘MPH’ are buried within the print itself. Can you spot them?

And that is how you make a screenprint
Or rather, it’s one way. Martin works alongside many talented artists who all have their own style or work in different ways. Everyone shares ideas and support. It is a very exciting art form, with limitless opportunity.